Ok now comes the hour we test our meddelers courage. Here is my continued tutorial on how to make weapons out of chicken wire and paper. But this time I will focus on the details and how to make use of both of the previous techniques on making swords to full effect to make the best looking sword around :-D
First up it is How To... make more details on a sword with just cheap and simple materials ;-)
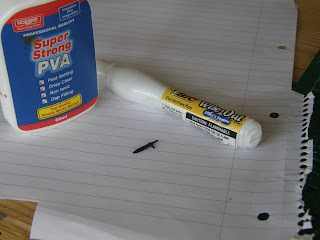 |
| You will need... A sword you prepared ealier, PVA glue and some "white out", "twink", "pen eraser", whatever you call it |
 |
Step 1: Put a little Pva glue on the areas shown, I don't know what they are called but is is the pommle?
then when the glue is starting to set add the first layer of twink/ white out. |
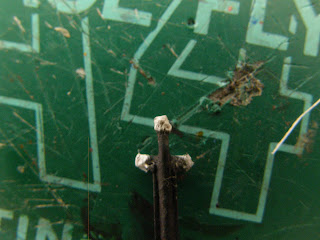 |
| Step 2: Once the first layer of twink/white out has set apply another one so that you build up these areas. Look at the top one see how it is starting to get that roung shape. I recomend that once this layer is dry you coat it in a wash of PVA and water to harden it if needs be |
 |
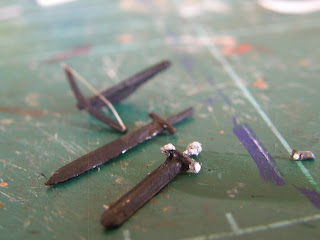
| Once everything has dried take a look. Does it look right to you? If not add more layers or file back the ones you've made. I recomend that if the sword is going to go in a ring hand you do not to the top pommle, what ever it is called. Also I used white out because it was cheap I got hold of one pen of it and a little bottle of it for just $2 at the dollar shop. You could use "Green Stuff" but a tube of that I bought for $14 so you can clearly see the savings |
Next up is the string for a bow
This next tip is similar to Paul's one but I've used a slightly different material and one that you really don't have to use I just used it for fun and because there is so much of it lying around.
 |
| Right get that cross bow you made earlier. Some PVA and some very thin string thread or hair. |
 |
| Todays hair comes from the huge amount left behind by my very funny dog Oscar! |
 |
| Step 1: Get somthing to hold the cross-bow in place. Add a bit of PVA glue to the stock and the ends of the now arms. next put the thread hair or string onto the bow, make sure it touches the PVA. Leave to dry |
 |
| Step 2: Once dry you can take the bow out of whatever was holding it and trim off any extra thread, hair or string. hey guess what all you need to do now is paint and your done. If you want you could add an arrow to the cross bow but there are other tutorials for this so I won't carry on. |
And last but not least we have the best looking sword. I made a broad sword here but you could make any sword with this method. The first few pictures are the same as before but that is because the first few steps are the same...
 |
| Step 1: You don't need any new equipment just the same as before so... Firt cut out. |
 |
| Step 2: Scale it |
 |
| Step 3: Hammer flat and shape |
Now things change...
 |
| Step 4: Cut out a bit of paper fold it in half. Open it up apply PVA put sword in the middle of one half and fold both sides together and press together as shown. Leave to dry. |
 |
| Step 5: Once dry cut to shape, bath in plastice glue, once the glue is dry add other details if desired, paint and done! |
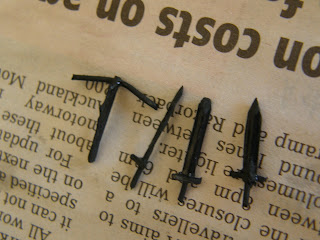
And there you have it details and improved swords here is a finnal picture showin them all lined up
 |
| Not bad eh ;-D |
So once again a chep and easy way to produce weapons on the cheap. I hope that some day soon I will be able to do another tutorial but my school trip/spanish trip to Argentina draws near and so to does my need to prepare for that. But anyway hope these prove as useful to you as they did to me. :-D


No comments:
Post a Comment